Loading...
Browsing Tag

grilling tips

Memorial Day: How to Be A Grillmaster in 15 Steps

If you are grilling for Memorial Day this weekend and need some grilling tips, you’ve come to the right place. Here are 15 of our fave tips we spotted from various sources and around the web and assembled into top 15 tips

1. Gas vs. Charcoal? – The age-old debate over which grilling method is “better” involves multiple variables, from flavor to cost to convenience. While no studies prove that either is healthier, gas does burn cleaner. Charcoal grills emit more carbon monoxide, particulate matter and soot into the atmosphere, contributing to increased pollution and higher concentrations of ground-level ozone. From a taste perspective, on the other hand, many people prefer the smokier, richer taste of food cooked on a charcoal grill.

2. Get It Hot!– Preheat your grill 15 to 25 minutes before you start cooking to make sure it reaches the right temperature (and to kill any bacteria). Your grill should be 400-450°F for high, 350-400°F for medium-high, 300-350°F for medium and 250-300°F for low heat. A properly heated grill sears foods on contact, keeps the insides moist and helps prevent sticking. While searing doesn’t “seal in” the juices (contrary to popular belief ), it does create improved flavors through caramelization.

3. Brush It Off – It’s easier to remove debris when the grill is hot, so after preheating, use a long-handled wire grill brush on your grill rack to clean off charred debris from prior meals. Scrape again immediately after use.

4. Oil It Up– Even on a clean grill, lean foods may stick when placed directly on the rack. Reduce sticking by oiling your hot grill rack with a vegetable oil-soaked paper towel: hold it with tongs and rub it over the rack. (Do not use cooking spray on a hot grill.)

5. Marinate Your Meat -Marinating does more than infuse food with flavor; it also inhibits the formation of potentially carcinogenic HCAs (heterocyclic amines), which form when grilling “muscle meats” like poultry, red meat and fish. According to the American Institute for Cancer Research (AICR), marinating can reduce HCA formation by as much as 92 to 99 percent.

6. Is It Done?– The best way to know if protein is fully cooked is to check its internal temperature with an instant-read thermometer.

7. The Hand Test– To gauge the temperature of a grill without a thermometer, place your open palm about 5 inches above the grill rack; the fire is high if you have to move your hand in 2 seconds, medium if you have to move your hand in 5 seconds and low if you have to move your hand in 10 seconds.

8. Tame The Flames- Flare-ups happen when fat drips onto the heat source and catches fire. This causes carcinogenic PAHs (polycyclic aromatic hydrocarbons) to form and accumulate on your food. Meat licked by flames also tastes “off” and flames may char the outside of food before the inside has thoroughly cooked. To reduce flare-ups, select lean cuts of meat, trim excess fat and remove poultry skin. And, keep a squirt bottle of water near the grill to quickly douse any unexpected flare-ups.

9. Give It A Rest – Let finished meats rest on a clean platter, tented with foil, for about 10 minutes before carving so juices can redistribute evenly.

10. Veggies Lift – Keep the lid up for Veggies so they don’t become too limp and are crisp not soggy

11. Fishy Fish – For fish, slice lemon and make a bed of them and lay the fish on top to grill.

12. Ribs Boil – Boil ribs for 10 to 15 minutes before grilling to make sure you kill all bacteria from them.

13. Get Saucy – Add the sauce during the last 15 minutes of grilling.

14. Keep it Juicy – Don’t flatten your burgers and cause all the succulent juice to run out. Instead poke them with a fork.

15. Portion control – To avoid overcooking or undercooking, grill smaller pieces of meat at a time.

YUM!!!!
Memorial Day: How to Be A Grillmaster in 15 Steps

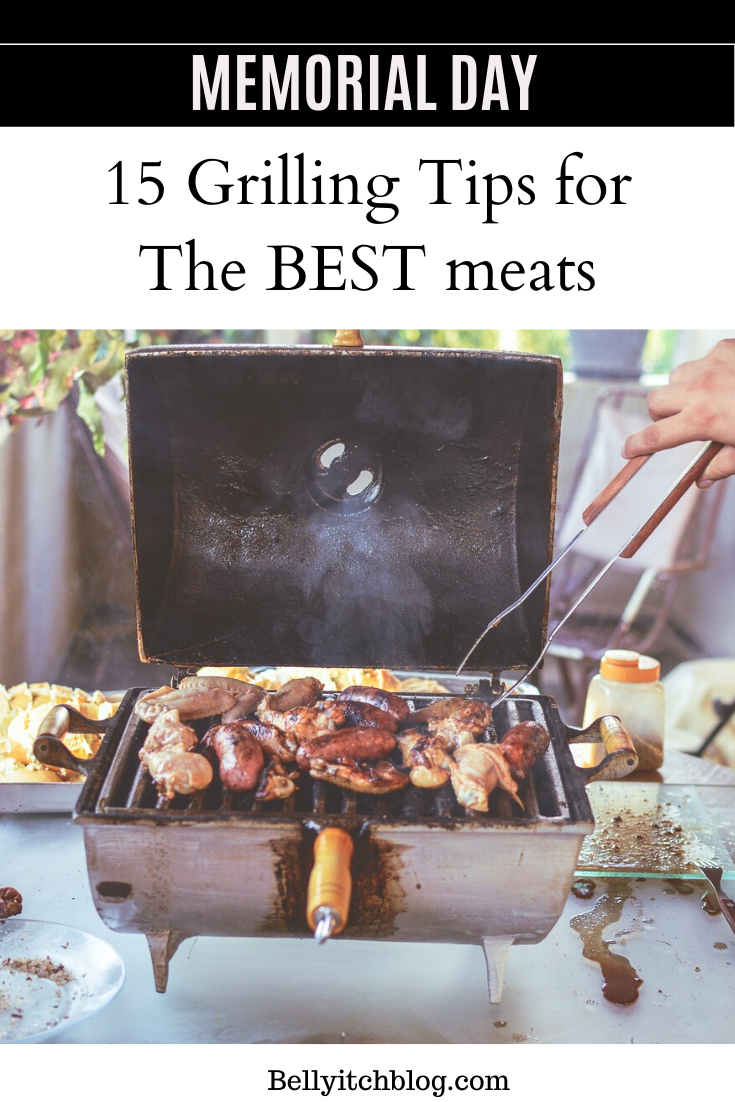
photo by Sitraka Rakotoarivelo

If you are grilling for Memorial Day next week and need some grilling tips, you’ve come to the right place.

Here are 10 of our fave tips we spotted from various sources and around the web and assembled into top 15 tips:

1. Gas vs. Charcoal? – The age-old debate over which grilling method is “better” involves multiple variables, from flavor to cost to convenience. While no studies prove that either is healthier, gas does burn cleaner. Charcoal grills emit more carbon monoxide, particulate matter and soot into the atmosphere, contributing to increased pollution and higher concentrations of ground-level ozone. From a taste perspective, on the other hand, many people prefer the smokier, richer taste of food cooked on a charcoal grill.

2. Get It Hot!– Preheat your grill 15 to 25 minutes before you start cooking to make sure it reaches the right temperature (and to kill any bacteria). Your grill should be 400-450°F for high, 350-400°F for medium-high, 300-350°F for medium and 250-300°F for low heat. A properly heated grill sears foods on contact, keeps the insides moist and helps prevent sticking. While searing doesn’t “seal in” the juices (contrary to popular belief ), it does create improved flavors through caramelization.

3. Brush It Off – It’s easier to remove debris when the grill is hot, so after preheating, use a long-handled wire grill brush on your grill rack to clean off charred debris from prior meals. Scrape again immediately after use.

4. Oil It Up– Even on a clean grill, lean foods may stick when placed directly on the rack. Reduce sticking by oiling your hot grill rack with a vegetable oil-soaked paper towel: hold it with tongs and rub it over the rack. (Do not use cooking spray on a hot grill.)

5. Marinate Your Meat -Marinating does more than infuse food with flavor; it also inhibits the formation of potentially carcinogenic HCAs (heterocyclic amines), which form when grilling “muscle meats” like poultry, red meat and fish. According to the American Institute for Cancer Research (AICR), marinating can reduce HCA formation by as much as 92 to 99 percent.

6. Is It Done?The best way to know if protein is fully cooked is to check its internal temperature with an instant-read thermometer.

7. The Hand Test- To gauge the temperature of a grill without a thermometer, place your open palm about 5 inches above the grill rack; the fire is high if you have to move your hand in 2 seconds, medium if you have to move your hand in 5 seconds and low if you have to move your hand in 10 seconds.

8. Tame The Flames- Flare-ups happen when fat drips onto the heat source and catches fire. This causes carcinogenic PAHs (polycyclic aromatic hydrocarbons) to form and accumulate on your food. Meat licked by flames also tastes “off” and flames may char the outside of food before the inside has thoroughly cooked. To reduce flare-ups, select lean cuts of meat, trim excess fat and remove poultry skin. And, keep a squirt bottle of water near the grill to quickly douse any unexpected flare-ups.

9. Give It A Rest – Let finished meats rest on a clean platter, tented with foil, for about 10 minutes before carving so juices can redistribute evenly.

10. Veggies Lift –  Keep the lid up for Veggies so they don’t become too limp and are crisp not soggy

11. Fishy Fish – For fish, slice lemon and make a bed of them and lay the fish on top to grill.

12. Ribs Boil – Boil ribs for 10 to 15 minutes before grilling to make sure you kill all bacteria from them. 

13. Get Saucy – Add the sauce during the last 15 minutes of grilling. 

14. Keep it Juicy – Don’t flatten your burgers and cause all the succulent juice to run out. Instead poke them with a fork. 

15. Portion control – To avoid overcooking or undercooking, grill smaller pieces of meat at a time. 

YUM!!!!

10 Kid-FriendlyThings to Grill This 4th of July

Fourth of July is for grilling in many cities in America.

While just about every adult loves a good cookout, grilling can be hit or miss with the kids. If you’ll be grilling for the family, you may want to stick to serving foods that are attractive to adults and kids alike, that way you can ensure that everyone ends dinner with a full belly.

The next time you’re grilling, consider these kid-friendly grill favorites.

  1. Cheesy corn on the cob: Peel back the husks and remove the silks.  Using kitchen twine, tie the husks together to make a handle to help little hands hold onto the corn.  This also helps keep the husks from burning. Soak corn in cold salted water for about 10 minutes.  Drain the corn and place it on the grill.  Close the lid and let cook for 15 minutes, turning it occasionally.  The grill should be set to medium heat.  Once the corn is golden brown, remove it from grill and brush with melted butter, chili powder and grated Parmesan cheese.
  2. Kabobs: Kids love nothing better than food on a stick; take corn dogs, Popsicles, and lollipops as a testament to this fact. For this reason, kabobs are a popular kid-friendly grilling option.  You can include the kids when threading the food onto the kabobs and they will like them even better because they helped to make them.  Remember, your kabob options are endless. You can make anything from peppers, onions, and chicken to pineapple, tomatoes, and ham, both of which are sure to be a hit.
  3. Sausage on a stick: Make your own sausage on a stick.  Try using regular polish sausages or the sausages with cheese on the inside of them.  Next, thread them on soaked wooden skewers or metal skewers lengthwise, as if it was a corn dog. Place them on the grill.  These sausages on a stick are fun to eat and much easier to manage than a bulky bun loaded with toppings.
  4. Peaches: If your kids like peaches, and even if they don’t, you have to try this sweet grilled variation of them.  Cut the peach in half and remove the pit.  Then dip the peach half into granulated sugar and place it on an oiled grill.  Keep the heat on the low side because it doesn’t take long for these beauties to warm through and get some grill marks on them.  Pull them off the grill, add a scoop of vanilla ice cream and you have tasty treat.
  5. Sliders: These small size burgers are easier to hold, and there’s less to eat so they work well for little hands and stomachs.  Take 2lbs. of hamburger and mix in salt and pepper to taste.  Form your sliders using a 2” biscuit cutter.  You should be able to get 12 sliders from 2lbs of meat. Press your thumb into the middle of each slider and chill patties for about an hour.  Place some party rolls, split side down on the grill.  Grill for about 2 minutes keeping an eye on them.  Take them off, butter them and tent them with foil.  Put the sliders on the grill and cook for about 3 minutes per side.  Take the patties off the grill and slide them on the toasted buns. Add any toppings your kids like.
  6. Pizza: What kid doesn’t like pizza?  Use your own pizza dough recipe or buy some pre-made dough.  Cut the dough into four equal pieces.  Have the kids pat their dough into a rough circle while you preheat the grill on high.  Throw some flour on the counter to make it easier for the kids to press out their dough.  Add the rounds to a baking sheet covered in a dusting of corn meal.  Take your tongs and a clean towel dipped in oil and oil the grill.  Then carry the dough rounds out and put the pizzas on the oiled grill. After they cook for 2 minutes, flip the pizzas over and have the kids add their toppings.  Pizza sauce, pepperoni, mozzarella cheese and any other favorite toppings can be added to create the ideal pizza. Close the lid and continue to cook the pizza for another 2-3 minutes.  Remove from the grill and let it sit for about 5 minutes before serving.
  7. Grilled potatoes: If you go camping you’ve probably heard of this recipe.  Take 3 large baking potatoes and cut them first in half and then into 1” slices.  Toss with olive oil, salt, pepper, paprika and garlic powder.  Preheat the grill to medium-high and then add a layer of sliced potatoes onto 2 layers of heavy duty foil that’s about 20” square.  Fold the foil around the potatoes tightly and grill for about 30 minutes turning the packet every 10 minutes.  Make sure the potatoes can be easily pierced with a fork and enjoy.
  8. Veggies and dip: Cut 2 zucchini and 2 summer squash into ½” slices cut on the diagonal.  Toss slices into ½ cup of Italian dressing.  Then grill for 3 minutes per side.  Remove from the grill. To make the dip, mix together 2/3 cup sour cream (low fat is fine), 2 chopped scallions (optional), ½ t. Worcestershire sauce, 1 t. lemon juice, 1 t. salt and a little pepper.   Kids can help mix up the dip while the veggies are grilling.
  9. Grilled bananas: While younger children may need a little help with this recipe, older children can certainly make them themselves with supervision. Place bananas on the grill in their skins.  Keep turning them until the skins are blackened.  Remove the stem and skins and slice. Serve them over ice cream for a special treat
  10. Pizza dogs: Cut slices into the hot dogs about ½” apart and ¼” deep.  Grill the hot dogs until heated through and the hot dog should be open at the cut marks.  Serve hot dogs on a bun with pizza sauce and mozzarella cheese. For younger children, be sure to slice the hotdog lengthwise before serving.

Eco-Friday: 20 Memorial Day Eco-Friendly Grilling Tips

grilling
It’s Memorial Day weekend and many families around the US may be hosting barbecues and cook-outs in celebration of the holiday remembering fallen soldiers of war or military servicemen who have passed away. As you prepare to host an event in your home, consider implementing some of these simple suggestions for having a Green, Eco-Friendly and Environmentally-friendly event.
  1. Plan ahead so you don’t have too much food.
  2. Use natural charcoal or better yet natural gas or propane grill which are more environmentally friendly.
  3. Buy local produce from local farmer’s markets
  4. Buy organic foods
  5. Consider vegan or vegatarian options which are better for the digestive system
  6. Use all natural insect repellant and bug sprays which are better on the skin, especially for small children
  7. Bring home the goods in a recyclable or paper not plastic bags
  8. Serve food on reusable plates and utensils or biodegradable or recyclable flat and tableware
  9. Start your fire with a chimney starter instead of lighter fluid
  10. Cook with pans and items made of recyclable materials
  11. Spread the energy consumed cooking around by having guests bring a dish
  12. Grill as much as you can, and even cook the foods in the burners on the grill because it saves energy
  13. Cover pans while cooking to reduce cooking time or energy bill if you are cooking on the stove in the kitchen
  14. Cut up the food into smaller pieces to let them cook faster and save energy
  15. Consider using a water-filter pitcher or a faucet mounted filter for water instead of bottle water
  16. Mix up a batch of lemonade or iced tea and serve in a large pitcher or punch bowl to cut down on cans and plastic bottles
  17. Figure out creative ways to “remix” the leftovers rather than dump them out.
  18. Compost the veggies or grill scraps.
  19. Clean up using non-toxic cleansers and Green cleaning products
  20. Recycle when you’re done!


Even if you can institute a few of these suggestions, you would have done at least something to reduce your carbon footprint, and give back to Mother Earth. Happy Grilling!

post signature

Memorial Day: 20 Green Grilling Tips

It’s Memorial Day weekend and many families around the US may be hosting barbecues and cook-outs in celebration of the holiday remembering fallen soldiers of war or military servicemen who have passed away. As you prepare to host an event in your home, consider implementing some of these simple suggestions for having a Green, Eco-Friendly and Environmentally-friendly event.

  1. Plan ahead so you don’t have too much food.
  2. Use natural charcoal or better yet natural gas or propane grill which are more environmentally friendly. 
  3. Buy local produce from local farmer’s markets
  4. Buy organic foods
  5. Consider vegan or vegetarian options which are better for the digestive system
  6. Use all natural insect repellent and bug sprays which are better on the skin, especially for small children
  7. Bring home the goods in a recyclable or paper not plastic bags
  8. Serve food on reusable plates and utensils or biodegradable or recyclable flat and tableware
  9. Start your fire with a chimney starter instead of lighter fluid
  10. Cook with pans and items made of recyclable materials
  11. Spread the energy consumed cooking around by having guests bring a dish
  12. Grill as much as you can, and even cook the foods in the burners on the grill because it saves energy
  13. Cover pans while cooking to reduce cooking time or energy bill if you are cooking on the stove in the kitchen
  14. Cut up the food into smaller pieces to let them cook faster and save energy
  15. Consider using a water-filter pitcher or a faucet mounted filter for water instead of bottle water
  16. Mix up a batch of lemonade or iced tea and serve in a large pitcher or punch bowl to cut down on cans and plastic bottles
  17. Figure out creative ways to “remix” the leftovers rather than dump them out. 
  18. Compost the veggies or grill scraps. 
  19. Clean up using non-toxic cleansers and Green cleaning products
  20. Recycle when you’re done!

Even if you can institute a few of these suggestions, you would have done at least something to reduce your carbon footprint, and give back to Mother Earth. Happy Grilling!

post signature

Memorial Day: 15 Last-Minute Grill Tips

If you’re like my family or are a harried parent, you may be just getting under way with your grilling for your Memorial Day cook out. If you are and still surfing for last minute grilling tips, you’ve come to the right place. Here are 10 of our fave tips we spotted from various sources and around the web and assembled into top 15 tips:
1. Gas vs. Charcoal? – The age-old debate over which grilling method is “better” involves multiple variables, from flavor to cost to convenience. While no studies prove that either is healthier, gas does burn cleaner. Charcoal grills emit more carbon monoxide, particulate matter and soot into the atmosphere, contributing to increased pollution and higher concentrations of ground-level ozone. From a taste perspective, on the other hand, many people prefer the smokier, richer taste of food cooked on a charcoal grill.
2. Get It Hot!– Preheat your grill 15 to 25 minutes before you start cooking to make sure it reaches the right temperature (and to kill any bacteria). Your grill should be 400-450°F for high, 350-400°F for medium-high, 300-350°F for medium and 250-300°F for low heat. A properly heated grill sears foods on contact, keeps the insides moist and helps prevent sticking. While searing doesn’t “seal in” the juices (contrary to popular belief ), it does create improved flavors through caramelization.
3. Brush It Off – It’s easier to remove debris when the grill is hot, so after preheating, use a long-handled wire grill brush on your grill rack to clean off charred debris from prior meals. Scrape again immediately after use.
4. Oil It Up– Even on a clean grill, lean foods may stick when placed directly on the rack. Reduce sticking by oiling your hot grill rack with a vegetable oil-soaked paper towel: hold it with tongs and rub it over the rack. (Do not use cooking spray on a hot grill.)
5. Marinate Your Meat -Marinating does more than infuse food with flavor; it also inhibits the formation of potentially carcinogenic HCAs (heterocyclic amines), which form when grilling “muscle meats” like poultry, red meat and fish. According to the American Institute for Cancer Research (AICR), marinating can reduce HCA formation by as much as 92 to 99 percent.
6. Is It Done?The best way to know if protein is fully cooked is to check its internal temperature with an instant-read thermometer.
7. The Hand Test- To gauge the temperature of a grill without a thermometer, place your open palm about 5 inches above the grill rack; the fire is high if you have to move your hand in 2 seconds, medium if you have to move your hand in 5 seconds and low if you have to move your hand in 10 seconds.
8. Tame The Flames- Flare-ups happen when fat drips onto the heat source and catches fire. This causes carcinogenic PAHs (polycyclic aromatic hydrocarbons) to form and accumulate on your food. Meat licked by flames also tastes “off” and flames may char the outside of food before the inside has thoroughly cooked. To reduce flare-ups, select lean cuts of meat, trim excess fat and remove poultry skin. And, keep a squirt bottle of water near the grill to quickly douse any unexpected flare-ups.
9. Give It A Rest – Let finished meats rest on a clean platter, tented with foil, for about 10 minutes before carving so juices can redistribute evenly.
10. Veggies Lift –  Keep the lid up for Veggies so they don’t become too limp and are crisp not soggy
11. Fishy Fish – For fish, slice lemon and make a bed of them and lay the fish on top to grill.
12. Ribs Boil – Boil ribs for 10 to 15 minutes before grilling to make sure you kill all bacteria from them. 


13. Get Saucy – Add the sauce during the last 15 minutes of grilling. 


14. Keep it Juicy – Don’t flatten your burgers and cause all the succulent juice to run out. Instead poke them with a fork. 


15. Portion control – To avoid overcooking or undercooking, grill smaller pieces of meat at a time. 

Enjoy!

post signature

Batman138 Bro138 Dolar138 Gas138 Gudang138 Hoki99 Ligaciputra Panen77 Zeus138 Kilat77 Planet88 Gaspol168 Sikat88 Rupiah138 Garuda138 Gacor77 Roma77 Sensa138 Panen138 Slot138 Gaco88 Elanggame Candy99 Cair77 Max7 Best188 Space77 Sky77 Luxury777 Maxwin138 Bosswin168 Cocol88 Slot5000 Babe138 Luxury138 Jet77 Bonanza138 Bos88 Aquaslot Taktik88 Lord88 Indobet Slot69 Paus138 Tiktok88 Panengg Bingo4d Stars77 77dragon Warung168 Receh88 Online138 Tambang88 Asia77 Klik4d Bdslot88 Gajah138 Bigwin138 Markas138 Yuk69 Emas168 Key4d Harta138  Gopek178 Imbaslot Imbajp Deluna4d Luxury333 Pentaslot Luxury111 Cair77 Gboslot Pandora188 Olxtoto Slotvip Eslot Kuy138 Imbagacor Bimabet